Friday, March 29, 2013

All Dresses up/ Pop & 'n Cuts


My new favorite is the All Dresses up Stamp set and Famelits.  Of course now you can also get it in a bundle.  This is on page 32 in the NEW Spring Catalog.  Along with the stamp set, framelits or bundle we can now purchase the Pop 'n Cuts card base and Dress form to make cards or scrapbook pages.  And with a little alteration you can even make the Dress Form Pop 'n Cuts for something else besides the dress.  I will show that next week.  Today I needed a Present for a friend of mine that is getting married soon.  And I decided to make this because it is so darn cute!!!!  Let me know if you like it and I will put directions.  I made her dress and her vail.  Love it! I know she will also.

All Dressed Up Stamp set  #129171  $21.95 (w)  or  #129174  $16.95 (c)
Famelits only  #130101  $24.95
Bundle ( includes Stamp set and Framelits)  #131096  $38.95  (w)  or #131095  $34.95 (c)
Card Base  #130099  $39.95
Dress Form Pop 'n Cuts  #130100  $21.95


Digital Studio is what I used for the text on the bottom.   Make whatever sayings you want using MDS Digital Download.

Mds Download - Digital Download   #130646
Regular Price: $22.17
Preferred Price: $19.95  Please add  me  as your demonstrator and the price is $19.95 now.  

Express yourself and impress your friends when you create projects using MDS, My Digital Studio’s digital design software.

With this download, you’ll get:
* Full access to the software and design tools to create cards, photobooks, calendars, and more
* The chance to buy additional content
* Ability to order your projects from our professional print services

Tuesday, March 26, 2013

Fabric Frenzy--Be sure to check it out--One week only March 25-31st


Page
    Item
Description 
Discount
       Retail Price
      Sale Price
170
126892
Essentials Designer Fabric
50%
     29.95
$    14.98
171
126893
Floral District Fabric
50%
$        9.95
$      4.98
171
126894
Comfort Café Fabric
50%
$        9.95
$      4.98
171
125411
Summer Smooches Fabric
50%
$        9.95
$      4.98
171
125412
Twitterpated Fabric
50%
$        9.95
$      4.98
171
122337
Timeless Portrait Fabric
50%
$        9.95
$      4.98
171
122336
Beau Chateau Fabric
50%
$        9.95
$      4.98
171
124066
Spice Cake Fabric
50%
$        9.95
$      4.98
171
122335
Flirtatious Fabric
50%
$        9.95
$      4.98
6*
129308
Tea for Two Fabric
50%
$        9.95
$      4.98
13*
129307
More Amore Fabric
50%
$        9.95
$      4.98
*2013 Spring Catalog

Be sure to check out the Fabrics this week.  Great week for GREAT discounts on Stampin' Up
Fabrics.  50% off  while supplies last.  So if you need fabric for gifts, Farmer's Markets, even the 
Holidays why not stock up and save yourself 50%.  


Happy Easter

I love to do punch art.  This is my bunny I came out with using my punches.  The tree I used the NEW Oval Collection Framelits Dies from the NEW Spring Catalog- pg 4,  #129381  $26.95.  Made a great hole in the tree for my bunny.  Then I used my Woodgrain stamp-pg 127,  #117100-$17.95.  I stamped it in Chocolate Chip ink on Soft Suede c/s.  The basket and the eggs are from A Little Bit of Spring stamp set in the NEW Spring catalog.  Pg 22-  #126009 (w)  $31.95 or #126011 (c)  $23.95.  Happy Easter is from the Delightful Dozen stamp set, pg 140,  #122650 (w)  $32.95 or #122652 (c) $24.95.  Now for the bunny:
ears:  lg oval #119855 $15.95
inside ear:  the same but after I punched it I put it back in and cut it down just a little...oh and the color is Melon Mambo.
Head: pg 184,  1 3/8" circle punch  #119860  $15.95
cheeks: pg 184,  1/2" circle punch  #119869  $5.95  used my dauber to make them pink
eyes: pg 185,   medium circle from owl punch  #118074  $16.95
nose:  Heart from the owl punch
feet:  pg 183,    Modern Label punch  #119849  $16.95  cut short and the stuck the straight end into my 3/4" circle punch.
Body:  pg 182  Full heart punch  #119883  $16.95

The grass is a retired stamp.  I used the white gel pen for his eyes and the black whiskers & nose dots are with the Basic Black pen.

I also made a little flower with the Itty Bitty Shapes punch pack pg. 183  #118309  $16.95 for his tail.

Hope you enjoyed my Bunny card.  Have a fun week!

Monday, March 25, 2013

Happy Easter Everybunny

Fun card using the Little bit of Spring stamp set.  The paper is Pretty in Pink, Pumpkin Pie, & Real Red.  I used the new Cloudy day Embossing folder found in the new Spring Catalog pg 38  #127022  $7.95.  I then used Bashful Blue to high lite the clouds.  The flower in her hand is from the Itty Bitty Shapes Punch pack on pg 183,  #118309  $16.95. 

Saturday, March 23, 2013

THIS and THAT---another sneak peek from the new 2013-14 NEW Idea Book/Catalog

Scroll down all the way to the Bottom to get all the info and a chance to win a trip to San Diego, Ca


Well, Where do I beging???
 Let's start out with the NEW ---THIS and THAT- another Sneak Peek from the new 2013-14
 Idea/ Catalog. 
I can hardly wait to see the new Catalog.  I know it's going to be spectacular this year. You do know this is Stampin' Up's 25th year and they are pulling out all the stops this year!!!!  It is so much fun to see all the things they are sharing with us so we can share them with YOU!  
I know this is a long posting this morning but I want you to know about it ALL.   
 

This is another item that will be in the new Annual Catalog when it arrives, BUT,  Stampin Up Has placed a special order starting today, through April 30th.

#131268 – Epic Day – This and That Journal $10.95
#130814 – Epic Day – This and That Designer paper $10.95
#130133 – Remember This and That Rotary Stamp $5.95
#131271 – Epic Day This and That Designer Stickers #4.95
#131269 – Epic Day This and That Designer Washi Tape #4.95
#133350 – EPIC DAY – THIS AND THAT BUNDLE – all 5 items listed above – $32.08 **15% discount

This bundle is only available until April 30th.
         
If you would like to be on my mailing list for upcoming classes, workshops,  or specials be sure to click on "Click on Below for Free Updates"  on the right side 1/2 way down on my blog.  

If you are interested in receiving a catalog be sure to email me with you information so I can send them out to you.  Use my Stampin' Up Link below and sign in under contact me at the top.  This is a safe & secure website.  http://www.stampinup.net/esuite/home/something4everyone/jointhefun  Once you are add on  my list I will send you out the catalogs as they become available. There you can let me know what  you are interested in and I can get it right out to you or contact you. 

Are you interested in earning free products?  Have a party.  It is amazing how many FREE fun things you can get by having  a catalog party.   I will send you everything you need to have a party-  (catalogs & order forms)  you hand them out- ask for them back by a certain date- and give them back to me and  I will send it in for you.  We can communicate by phone, email, or in person if you live close-whichever you prefer.   If you are interested let me know on the website above and I will contact you. 
Let me know if you would like to be a part of my team.  It doesn't matter if you are close or far we can always be Stampin' friends.                                                 


Did you notice that Pool Party & Calypso Coral are 2 of the colors they are using for this?  Does this mean they will be back in the NEW Catalog?  I am hoping they will.....they are 2 of my favorite colors. How about you?


In other news:  Be sure to check this out 
Also, now thru April 30th: Enter to win a trip from Stampin' Up! to San Diego!


And.......Just a heads up...if you're into fabric,
Coming up on Monday,  March 25, 2013- March 31, 2013 Stampin' Up will be having a 
Fabric Frenzy 50% off Sale!  

Friday, March 22, 2013

Easter Basket

Isn't this just the cutest Easter Basket.  My next class is going to be making your own baskets.  Be sure to check it out on my Events/Classes site on my home page or go to
http://www.stampinup.net/esuite/home/something4everyone/events
to find out about the class.  We will be making 3 projects one is the basket, a card and a item for the basket.  Fun class.
Thanks for looking.


Everybunny Stamp set  #122705 (w)  $27.95 or #122707 (c)  $19.95  Pg 25 in the lg 2012-13 Idea book/catalog

Thursday, March 21, 2013

Spring is in the Air......sneak peek of 2013-14 Annual Catalog


Spring is definitely in the air, and I can't wait to show you all the new product in the 2013-2014 annual catalog. Here's your pre-sneak peek look at A Round Array!

Bundle (the 7/8 " Scallop  Punch and the Stamps offered at a discount)

Price                                     Description                                                   Item #

$23.95 US/$29.95 CAN     Spring Surprise Bundle* (English; clear)     133899

Already have the Punch and just want to buy the "A Round Array" Stamp set?  You’re in luck!

Just the Stamps are offered for:

Price                                         Description                                                Item #
$14.95 US/$17.95 CAN     A Round Array Stamp Set* (English; clear)  #129090

*Only offered in clear-mount. Wood-mount option will be available during the 2013–2014 annual catalog.

Please contact me today to get this Bundle or just the stamps more than a month early!
Thanks for looking
Cheryl

something4everyone.stampinup.net

Wednesday, March 20, 2013

It's Officially Spring

Can you believe it's the first day of Spring.  I hope you are having beautiful weather to start this season off.  Here it's been POURING all morning but the afternoon is still to come and I am hoping for sunny skies.  So to keep busy I made a bunny candy house.  I put a little jumping bunny and some candy in it.
I made it with the tags dies pg 193 in the big Idea/Catalog book.  # 115954  $21.95
I use this alot to make bookmarks, and little candy boxes.  I usually have been using the small tag so this morning I decided to use the larger tag.  The box measures 4 3/4 x 4 3/4.  Scored at 2"  on all sides.  The 2 sides across from each other I cut on both of the sides next to the middle.  (You should only have 4 cuts total-2 on each side)  I then fold the ends to the inside and glue them together.  I cut 2 large tags and glued them to both sides of the box.  I cut a piece of DSP(sorry this one is retired but this was the first one I made and sometimes I have to do a little adjusting-not this time)  Cut my DSP at 2" x 8 1/2" and taped it to the side of the box.  Keeping it right at the same height as the sides.  Then I used the New  5/8" Flower Trim pg 5  New Spring Catalog  #126869  $6.95  -you get 2 yards .  I use it alot because I think this is one of my favorite things in this catalog along with the Delicate Details Lace Tape pg 3 New Spring Catalog,  #130966 for  $9.95.  You get 2 rolls and you can use them over and over again if you use you dauber to ink it on your paper and then remove it.  It turns out very pretty and if you use Versa Mark you can even emboss it and it is beautiful.  Anyways,  let me get back to my instructions.....I used some Very Vanilla ribbon to tie through the holes that are already cut from the tag die and tied a knot.  Then made a small Very Vanilla bow and using a glue dot I attached it on the other side.  I then decorated the top with some extra paper, added a sentiment from the -A Little Bit of Spring Stamp set- pg 22 New catalog  #126009 (w) $31.95 or #126011 (c) $23.95.   Made a little flower using the 1" scallop punch and the new 7/8" scalloped punch. This was pretty easy.  And really cute.  I always make things to give to our neighborhood kids and this is going to be one of them.  I think they'll really like it.  Let me know if you do.
If you need any help please do not hesitate to call me.  Thanks for looking.  And Happy Spring!

Monday, March 18, 2013

NEW Basket Class

Basket class MAR 28  10:00 AM - 12:00 PM (Pacific)
2 Classes------ 10:00-12:00pm and 6:00-8:00pm
This will be a  FUN class!   We will be making a  basket and you will go home with supplies to make 2 more.   Making your own baskets are not as hard as they look.  Once we make one-you will be able to make all sizes.  We will be making the basket, a card, and a Easter Chick Candy holder.
 Date;  Thursday  April 28th    I will be having 2 classes that day.
Time: 10:00-12:00      6pm-8pm
Cost:  $20.00
Bring adhesive and scissors. 
Limit of 4 people per class
RSVP is needed by Friday, March 22, 2013 12:00pm
253-987-7147
You will receive a kit.  We will use it to make 1 basket and the rest you can take home to make more or something else you would like to make.
Kit contents:
3-pieces of  Tea for Two DSP.   (new in the Spring Catalog)  pg 3
3- 1 1/2" pieces of cardstock - Calypso Coral, Island Indigo, Pretty in Pink (one of each)
2-4 1/4" x 11" cardstock for decorating  (I will have these cut and you can pick which ones you want)
1-4 1/4"x 5 1/2" cardstock (lucky Limeade) for decorating
14- 5/8" Flower trim  (New Spring Catalog)
1- 6" Delicate Details Lace Tape  (reuseable) ( New Spring Catalog)
18-Rhinestones
Pictures on my Stampin' Up Website

http://something4everyone.stampinup.net
RSVP by Friday March 22nd.  
I need to place my supply order for the class.

  These are the other 2 projects we will do at the Basket Class.


 I will show you how to make a basket and you will be able to make  different sizes by adjusting the paper size.  Baskets for any season. 


Mojo Monday

Mojo Monday - The Blog - Mojo Monday 285

Hello mojo fans, it is Monday, our favorite creating day of the week! Julee has designed a super fun sketch for you to use, we had a blast with this one! So many creative possibilities, we can't wait to see what you do with it. Have a great week mojo friends!

To play along, just make a project using the provided sketch and upload it to your blog or online gallery. Then leave a link to your project using the linky widget at the bottom of this post. Please use a direct link to your Mojo post and not just your blog.
If you upload to online galleries, please also use tag/keyword MOJO284Verve stamps are NOT required to participate, and you can enter as many times as you want.  As always, if you don't have a particular shape, feel free to substitute.
There is no time limit - you can always play any week at any time, but I will close the linking form on Sunday night, March 17 at 8:00pm (Mountain). That way there's no confusion which linky is the current one. If you upload to online galleries, please use keyword/tag MOJO284.


 Hi
I'm Paper Pumpkin . . .
I come to your door each month (a fully decked-out creativity carriage). I'll help you to escape your life with some paper fun.
I come in a sweet box, but you'll really love what you find on the inside:
All the stamps, ink, paper, and accessories to create pinable projects. Create stuff like cards, journals, décor, and more!
Paper Pumpkin by Stampin' Up! is a new monthly kit program that anyone (even you) can enjoy!
How You Order:
Sign up for your monthly Paper Pumpkin starting Monday, January 14 by visiting https://mypaperpumpkin.com/en/ and click Get it.
Starting in early March, you can try Paper Pumpkin for one month by visiting our online store.


  Try Me—You'll Like Me
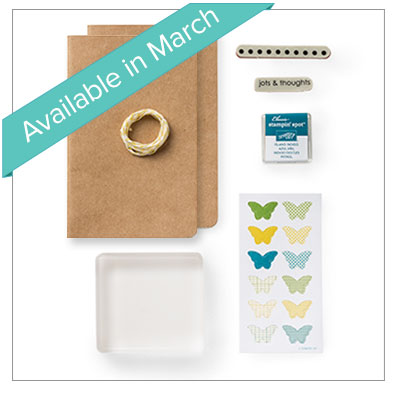
  Available in March
  • Afraid of commitment? Too much pun'kin for you to handle? You can try me and I'll visit just once. (But I know you'll want me to come back every month.)
  • • I'm $16.95 (plus shipping).
  • • I've got all the stamps, ink, paper, and accessories to create beautiful projects.
  • • I'm all cut, measured, and ready—with instructions included. (Don't worry, I'm easy. 
            The only thing you need is adhesive.

Subscribe here
Click here to subscribe for Paper Pumpkin to come to you door every month.  Cancel at anytime. 
If you would please put me as your demonstrator when you sign up I would truly appreciate it.  Thank you so much!

Sunday, March 17, 2013

Happy St Patrick's Day

  Don't you just love to watch as children work so hard on something they are giving to someone.  I love this picture.  She was putting the finishing touches of glitter on her Shamrock.  Sometimes you just have to stand up and put those finishing touches on.   Today she told me she was giving this to someone at her gymnastic's competition.   The other one she was putting in her room.  Last month she was here to make the Valentine's Day candy boxes for someone.  I was so impressed with her ability to follow directions-she was just amazing. 

Didn't they turn out GREAT!  One 3 leaf clover and the other is a 4 leaf clover.   And one other thing-----Kennedy made them all by herself.  All I need to do is tell her what  to do.  She's amazing!

Happy St. Patrick's Day everyone!

Friday, March 15, 2013

One of my school projects...St Patrick's Day


This was one of the school projects I did this week at Ali's school CCHS.  (Cascade Christian High School)  The kids are all in 9th & 10th grade- both boys and girls.  The Applied Arts teacher-Mrs. Cole- has been asking me each semester to come and teach the kids how to make cards.  We make 3 cards and 1 fun project for them. (Even Mrs. Cole get's to make them). One of the 3 cards they make, they give back to the teacher (card of their choice) and they take them to a convalescent home and give to the elderly.  How exciting for them to receive a card and how nice it is for the students to be able say they made it.  Each kid writes their name on the back of the card so whoever receives it can see who made their card.  The other 2 cards are for them to use.  I make 3 cards samples- 1 easy, 1 medium & 1 harder.  The kids do all the work on the card.  I just make the sample and cut the paper for them.  I bring the Big Shot, embossing folders, framelits, stamps, ink, punches-everything they will need to complete the card.  I go over how to use the Big Shot, framelits, embossing folders  and everything they will need to complete the card and they do the rest.  The Big Shot is always the hit of the class.  When they see what it can do they just love it!

The 3rd card will start the day off on Monday.  And, I will tell you the ones they have done have all turned out beautiful!  Some make them exactly how I made the sample and others make it their way.  I think they have all turned out beautiful.  Yesterday, we started the class off  by making the Shamrock  so they could take it home with them for St. Patrick's day. They all enjoyed making these and I love watching them make them.  Cards and crafts are alot of fun to make.  Sometimes they just look harder than they really are.
I will post the other projects next week after they have finished.  I want them to be surprised.   I hope you have a Blessed St. Patrick's day weekend!


Wednesday, March 13, 2013

Introducing Photopolymer Stamp Set

Introducing Photopolymer by Stampin' Up!

 Designer Typeset Photopolymer Stamp Set    #132956    $13.95   

  Recommend clear blocks A, B, G, F, and I. Purchase separately.

Includes 57 pieces. (Don't faint! This is a good overwhelming feeling.)

 Click here to see them on my Stampin' Up website:

I’ve always wanted to be a graphic designer. In fact, my aunt had one of those original Macintosh computers with the itty bitty screens and when we’d visit, she’d let me use it. It had this awesome program that would let you design cards. It was pretty cutting edge back then. Obviously, the time spent in my aunt’s home office foreshadowed my professional choices as an adult.

My favorite part about design is typography. I adore type. There’s just something inherently beautiful about letterforms and what happens when you stack them to create different shapes and combine them to say different things. So when I was asked a few weeks ago to create some artwork for our first-ever photopolymer stamp set, I jumped at the chance to do something that would speak to my typography love. Can I get a holla?! Additionally, I wanted to focus on the cool benefits of photopolymer stamps (but we’ll get into that in just minute).

So without further adieu, let me introduce you to the Designer Typeset Stamp Set. It’s based around a really great san serif font that will work well on just about any project. And then there are embellishments and shapes to take whatever you want to say to the next level. The possibilities are seriously endless.


I’ll admit, once I started playing around with the stamp set, I had a hard time stopping. The mess that has taken up residence in my craft room attests to this fact. So many witty one-liners, so little time.


But before I get too carried away, let’s get to talking about the benefits of photopolymer stamps. For those who are unfamiliar, let me point out a couple of things I personally find really cool.

First, they’re completely clear, making it oh-so-easy to stamp exactly where you want. They come unmounted, on an acetate sheet, and temporarily adhere to our clear blocks. Awesome!


Second, they are pliable. Want your arrow to shoot a certain way? No problem! Want your banner to have the perfect sag? Easy peasy! Being able to play with the shape gives you even more creative freedom.
#132956


 Designer Typeset Photopolymer Stamp Set
Recommend clear blocks A, B, G, F, and I. Purchase separately.
Includes 57 pieces. (Don't faint! This is a good overwhelming feeling.)
$13.95

Tuesday, March 12, 2013

Cascading Card

 A few weeks ago  when my daughter was sick I was sitting in the Dr office, reading one of  his magazines and  I came across an articale with a picture of a card someone had made. I loved it but No directions of course but I was thinking I might be able to make it.   So I took a picture of it,  went  home, and forgot all about. it til I found the picture last night at dinner.  So I decided to try and duplicate it. It took me a while and  I'm not so sure I made it the same as the person in the magazine did but I really do like it how it turned out.  So the name I gave it is the Cascading card.  It does fit in an envelope--yep I tried.  I am going to make another one and then I will be having a class on it.
I used the Secret Garden bundle for the flowers and Birthday Bash stamp set.  Kinda cool hun?  And folds down really nicely.  Let me know what you think.

Monday, March 11, 2013

It's Mojo Monday Time-284

Mojo Monday - The Blog 


Good morning and welcome to a new week at Mojo Monday!  We are amazed by your entries last wek during contest week, mojo fans rock!  This weeks sketch is another fun sketch, created by Julee...have fun!  Be sure to stop back by on Tuesday evening to see if you are a winner from last weeks contest.

To play along, just make a project using the provided sketch and upload it to your blog or online gallery. Then leave a link to your project using the linky widget at the bottom of this post. Please use a direct link to your Mojo post and not just your blog.

If you upload to online galleries, please also use tag/keyword MOJO284. Verve stamps are NOT required to participate, and you can enter as many times as you want.  As always, if you don't have a particular shape, feel free to substitute.
There is no time limit - you can always play any week at any time, but I will close the linking form on Sunday night, March 17 at 8:00pm (Mountain). That way there's no confusion which linky is the current one. If you upload to online galleries, please use keyword/tag MOJO284.

Sunday, March 10, 2013

Sale-a-Bration

Remember only 12 more days til Sale-a-Bration ends.  With every $50.00 purchase you receive something in the catalog for free.  Check it out.  There are some fun things in our catalog.  Any questions please do not hesitate to give me a call.  Thanks for looking!

 Click here to see the Sale-a-Bration catalog

Thursday, March 7, 2013

Hoppy Easter

I love Easter cards.  Bunny's, chicks, candy, eggs, all the cute little creatures that go along with Easter.  This set is the Everybunny Stamp set-  #122705 (w) #122707 (c) found on page 25 in the idea book/lg catalog.  I used Melon Mambo & Rose Red for the papers and some Pumpkin Pie to accent it.  The New Cloudy Day embossing folder found in the new Spring catalog pg 28  #127022  $7.95.  (I used it after I stamped the bunnies and the eggs).  I used my dauber in Bashful Blue ink on the sky and then ran it through the Big Shot using my cloud embossing folder about 1/3 of the way down the page.  I stamped the stem of the little flower that the girl bunny is holding and then I punched out 4 little flower petals from the Itty Bitty Shapes Punch Pack  #118309  $16.95 page 183 (large catalog).  Fun card.  Hope you like it.  Have a wonderful day!

Wednesday, March 6, 2013

Easter Class

Here are the cards we will be making for the card class on March 14th.  We will be making 3 cards and 1 surprise project.  (You'll like it) 
Class size is limited to 5 people.  If you are interested in the Saturday morning class let me
know and I will add one. 
Where:  Cheryl's house
Time:  6:30-9
$15.00

All you need to bring is scissors and your own adhesive.  Everything else will be provided. 

The bottom card is my Mojo Monday entry for this week.  The stamp set we will be using is the new Secret Garden stamp set.  This set also comes in a bundle with the framelits.  If you would like to order this before the class let me know. 

There will be door prizes.

If you bring a friend you get a $25.00 punch on your Blossoms card.

Buy $30.00 in merchandise the class is free to you.

Hope to see you there.

Blessings,
Cheryl

Monday, March 4, 2013

It's Mojo Monday time

Mojo Monday - The Blog - Mojo Monday 283 Contest


Good morning, it is contest week at Mojo Monday..woohoo!  We luv contest week as much as you do, we luv seeing all those fabulous entires!  You know the drill, use the amazing sketch that Carole has created and come back and link up your card.  Happy creating!
If you upload to online galleries, please also use tag/keyword MOJO283. Verve stamps are NOT required to participate, and you can enter as many times as you want.  As always, if you don't have a particular shape, feel free to substitute.
The Prizes: We'll have one winner for every 50 entries, up to a max of SEVEN winners!!! Winners will receive the Verve Stamps set of their choice.
How to play: Just upload a creation using this week's sketch to your online blog or gallery. Then leave a direct  link to your project in the linky widget at the bottom of this post.  If you upload to online galleries, please also use tag/keyword MOJO283 Our challenge is open to everyone, Verve stamps are NOT required to participate, and you can enter as many times as you want.  As always, if you don't have a particular shape, feel free to substitute.

 Here is my Mojo Monday Card for this week.  I love these colors.  Don't you?  These are the new incolors for 2012-13.
Here is what I used for this card:
Midnight Muse c/s  #126843
Raspberry Ripple c/s  #126842  & RR ink  #126859
Gumball Green c/s  #126840
Crumb Cake c/s  #120967
Secret Garden Stamp set pg 17 in the new Spring catalog
  #129144  $18.95 (c) or #129141 (w)  $26.95  or this set comes in a bundle w/ the new Framelits & Stamps set together you save !5%  Bundles  priced at (c) #131099 $36.95 or (w)  #131100 $42.95.
Blossoms Petals Builder punch  #121808  $16.95
Scallop Trim Corner punch #118870  $9.95 
Scallop Trim Border punch  #118402
Scallop Circle Bigz  #113468  $19.95
3" Circle Originals  #122125  $17.95
  Blossom Party Originals  #115971  $17.95
  Polka Dots embossing folder  #117335  $7.95
  2-Daffodil Delight brads
  Pearls Basic Jewels  #119247  $4.95
  Stickles
I embossed the flowers with White embossing powder-heat set it and then went back and added more white ink with versa mark-then embossed again with white embossing powder.  Heat set it and using my aqua painter I used Raspberry Ripple ink to fill in the rest of my flowers.  Everything is embossed with the Polka Dot folder.  The flower centers is colored with Daffadil delight ink and then I used yellow stickles to make it pop.  The white background paper I embossed and then dotted the dots with diamond Stickles.  Hope you enjoyed my card.  Why don't you join me and make a card for Mojo Monday.  It's fun!

Sunday, March 3, 2013

How to make a Daffodil

I was walking the Puppies the other day and saw that the Daffodils are peeking there heads out of the ground.  Maybe Spring is around the corner.  So I came home and decided to try and make a Daffodil.  I was thinking it would be hard but really not so hard at all.  So here how I did it.
 Down below is a pic of the things I used.  The Green stem base I actually did in yellow...Same as the flower color.  I showed it in green so you could see it good.  The leaves I cut by hand.  Daffodil leaves are long and pointed so I used Gumball Green and attached them to the stem.  I also added another flower that I added after I put on the leave.  I just nestled it in between the the stem and leaf.

Daffodil Delight c/s  #119683  $6.95
Gumball Green c/s  #126840  $6.95
cut 5 of the lg petals using the Blossom Petals Builder punch  #121808  $16.95  (these are the  flower petals)
cut 1 using the  1-3/4" Scallop Circle punch  #119854  $16.95 (this is the center piece)
cut 4 using the Itty Bitty Shapes Punch Pack  #118309  $16.95
(these are inside the the center of the flower)
1-gumball green piece of 1/2" x 6"

                                                    
cut 1  3/4" Daffodil delight  circle punch
1- orange brad
2-  1/2" circles
Bone folder
sm wooden Dowel
Glue gun
Silicone mat

Directions:
Petals
Using your bone folder curl up the edges of the petals til you get the desired shape you want.  Lay out all the petals on a your silicone mat and space them out evenly.  I cut off the bottom a little and made them a little shorter.  Then I punched a 1/2 circle off the bottom end so they would not be bulky and it was easier to shape them.  (The center will be covered up).  Glue them into shape and set aside.
Scalloped circle center.
Cut a small hole in the center of the scallop  & count around 8 little scallops.  There are 14 but I used only 8.  Using my scissors I cut to the  point in the center and cut away 5 scallops.  The scallops left I then made folds on each point all the way around.  This is what made it a circle.  I glued the last 2 scallops together - one on top of the other to make the circle. .  (See pic below) 
Flower Center 
Put a brad through the little flower like shapes and through the small 1/2 " circle.  Using your finger fluff up the sides of this little flower shape.  Cut a tiny bit off the 1/2" circle piece now.  Then glue it down into the center piece that you just made.  Then glue this piece to the center of the flower petals that you just made. 
Stem & Flower stem
Using the 1 3/8" DD circle  fold it into a cone shape and glue.  Leaving one end bigger than the other.  The larger end use you scissors to make cuts to help form a circle to adhere to the back of flower.   Using your exact o knife make small straight lines in the middle to fit around the stem and glue into place.  (just keep sliding it up on the small end til you get the right size to hide the rough edges).  Glue into place.  
The Stem I wrap the 1/2" x 6" piece of Gumball green around a wooden dowel (but use anything small and round like a pencil) just til you get the roundness you desire.  The end has to be small enough to fit into the yellow part of the flower.  When you get it glue it inside and slide the stem in.  
Leaves
Leaves on Daffodils are long and thin.  I just cut 3 long pointed leave out by hand and glued them so the leaves would be close to the bottom of the flower.  I then added one more flower but cutting the stem at a V and gluing it in place behind a leaf.  Add more leaves if you wish. 

If you want a longer stem then add more inches to the 1/2" piece of paper. 
You can make your petals shorter if you want or cut them in on the sides to make another shape.  I have done this also.  Once you have made one it will be easy for you to  change it around.

Hope you enjoyed this tutorial.
Thanks for looking.

Blessings,
Cheryl

Need a catalog, demonstrator I would love to help you.  
www.something4everyone.stampinup.net

Saturday, March 2, 2013

How I make Roses


I have had alot of questions on how I make my roses.  So, I decided to explain how I make them.  Depending on how large you want them is how many petals you punch.  My rose is about the same size as a real rose.  But the smaller ones are just as pretty.  Use whatever color paper you want and you do want to ink the edges of each petal so pick a color that makes each petal stand out.  After your all done you can glitter it all up if you want.

This is what I used to make this rose.

Very Vanilla c/s  #101650
Petals are made from my Ornament punch  #116847  $16.95
Rose Red ink  #126954
Lucky Limeade c/s   #122926

Blossom Petals Builder punch  #121808  $16.95
1 3/8" Circle punch  #119860  $15.95
1/2" Circle punch  #119869  $5.95
dauber
pencil
bone folder
crimper
glue gun


Flower instructions
I punched 27 ornaments and used the Rose Red ink around the edges of each one.  The pointed side is the top side of the rose.  The other end you want to use to adhere it to the circle punch.
1- Very Vanilla  1 3/8" circle punch.  This is what you adhere each ornament punch to to make your rose. 
  Cut one piece of Very Vanilla c/s- 1 3/8" x 1 3/4".  On a diagonal cut down about a 1/2 " and use the dauber again on this area.   The use the dauber on one end and down on both sides.  This is the center of the flower.  Using your bone folder  break down the paper on both sides.  The use the pencil to wrap it up into a tight circle for the center of the flower.  Make it as tight as  you can get it so when you let it loose it looks like a flower center.  If it needs to be tighter do it again and when it looks right use you glue gun on the side to make it stay that way. On the bottom use you scissors to cut small cuts about 1/4" up and bend them upward.  Set aside.

Stem, & Back of flower
Cut 2 Lucky Limeade 1 3/8" circles. First use your bone folder to break down the fibers of your paper then on a diagonal round fold, fold the circle in half(round)  with one end small and the other end bigger.  (see pic)  Cut ends on larger end about 1/4" up.  Using your 1/2" circle punch-punch a circle in the center of the other Lucky Limeade 1 3/8" circle. (see pic)  Set aside.
The longer piece of lucky limeade measures 1/2" x 5 1/2".  This is your stem.  Wrap you paper around the pencil to make it easier to role into the stem.  This piece must be small enough to fit into the small end of the round lucky limeade piece you just made.  Use your glue gun to adhere them together.

Leaves
Using your Blossom Petals Builder punch cut 3 (or however many leave you want) of the long petals.  Fold each one in 1/2.  The using the crimper-face the open side to the left and run it through on a slight angle.  This will make it look like the vanes in a leaf.  Open it up and using your finger just bend it down slightly to make it look pretty.  Set aside.

Now lets put it all together.

Start by using your glue gun to put the center (the end with the little slits) onto the round piece of Very vanilla c/s. (I put my off center just a little so it didn't look too straight).  Then start adding your petals with the pointed side upward.  You want to make each row not directly behind the one in front of it.  Keep going it you get the right size you want for your flower.  I thing I used about 27.  When you get to the edges keep pulling them down a little to cover the bottom and the last layer you want to put the little lip on the outside of the round Very Vanilla c/s.
After the last petal glue your small circle round stem to the back of the Very Vanilla c/s close to the center.  Then glue the Lucky Limeade circle with the smal circle cut out  on to cover the V Vanilla circle.  Glue the long narrow L Limeade piece into the center of the stem.  Add the leaves and you have a beautiful rose.

Adjust the lenght of you stem by adding more inches.

Hope you enjoyed this.  Let me know if you have any questions.

Blessings
Cheryl